Network topology
If you are not an IT professional or manage the DNS infrequently, then understanding where the CIRA DNS Firewall fits will help you to understand what you need to do. Full documentation is provided to all CIRA DNS Firewall customers.
In the past, the modem to the internet was separate from the router you used in your home or small business. Today, these two devices are often combined into one device, often called a gateway.
In a similar way to how your business or home router knows where the devices (i.e. PCs, phones, tablets, smart TVs etc.) on your network are located, the CIRA DNS Firewall servers know where servers on the internet are located. This is traditionally called a recursive resolver and the difference is that the CIRA recursive resolver refuses to provide directions to cybersecurity threats.
For most small and medium businesses, the recursive service is delivered by an Internet Service Provider while many, if not all, large organizations run their own. For you to change it there are several options.

Configure CIRA DNS Firewall service for your organization
CIRA operates the CIRA Canadian Shield for households as a free and open recursive service. But for business, to get the security and reporting they need the service is not open and we are required to whitelist access to our resolvers. This improves security and performance for our customers by keeping the service dedicated to their needs.
- When you sign up for the service, you will receive an email from our customer service representative providing web portal login credentials to configure your security settings that will include the IP address. For those with dynamic IP addresses we have service options that can handle those, but you will be required to contact us to configure.
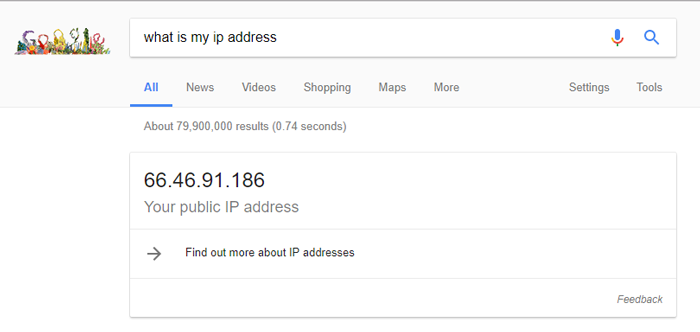
- If you do not know your IP address, then finding it easy. For example, typing “what is my IP address” into a Google search bar will return the result, and there a number of web services that can do the same.
- At this point, no configuration is required in the CIRA DNS Firewall web portal in order to be protected. By default, malware and phishing protection is turned on and content filtering and Google safe search is turned off. If you want to make changes to these settings the web interface is easy to navigate and the technical documentation is available in the help files if you need them.
Gateway configuration
There are hundreds of different hardware scenarios that organizations in Canada could be using to access the internet. Most operate in a similar fashion, and while not generally not designed for complete technology neophytes, the average user is capable of using the software if they follow the steps closely. These steps will be explained in the technical documentation for your router or gateway and can likely be found online from both your provider and helpful users who have posted videos and guides.
Set-up – example using the Bell Connection Hub
This example uses the Bell Connection Hub. Most routers and hubs are highly similar and this article will provide overviews on many of the popular new ones – https://www.lifewire.com/how-to-change-dns-servers-on-most-popular-routers-2617995 .
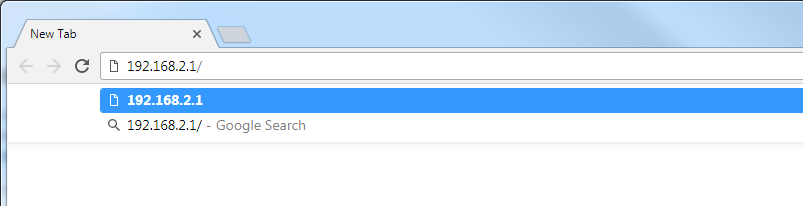
- Determine the IP address for your gateway. For most Bell configurations this is 198.168.2.1. Enter this address in a browser. Other common gateway addresses include 198.168.1.1 and 198.168.0.1.
- For Bell and for most router/gateways the default username is admin and the default password is admin. Hopefully, for security reasons, you are not using the default setting and will have your own username and password. If you have lost them then you will need to reset the router to factory settings. Consult your gateway technical documentation.
- On the left side navigation select internet.

-
In DNS Settings, choose the radio button and manually specify DNS information
For Primary DNS, enter: 162.219.51.2
For Secondary DNS enter: 162.219.50.2Note 1: CIRA DNS Firewall has built-in backup with multiple servers in each node and multiple geographically distributed nodes deployed using a technology called, anycast. It also operates across two different “clouds” or IP addresses to provide you with backup. If you specify a secondary DNS from an insecure provider then in the unlikely event that CIRA DNS Firewall were to go down, your router would default to the secondary DNS and you would not know that you are browsing unprotected.
Note 2: For those that want to use an IPv6 address to access the CIRA DNS Firewall service you will use this IPv6 address as your Primary DNS (not recommended for normal users): 2620:10a:8054::2 and 2620:10a:8055::2
-
Save your settings and close the browser.
-
Some devices on your network may require a re-boot in order to begin using the new DNS settings.
Advanced option – setting up Windows Server as a forwarding DNS server
If you are running your own recursive server and wish to continue to do so then you will configure it as a forwarding DNS server to the DNS Firewall nodes. You likely already have the expertise to manage the technology so we won’t go into a high level of detail on configuration here:
- Run Server Manager and select tools. Then DNS.
- Right-click the hostname and select properties
- Select the forwarders tab
- Input the hostname or IP address of the CIRA DNS Firewall 162.219.51.2 (and backup with 162.219.50.2)
- Delete any existing/additional forwarders so that you are only using the CIRA DNS Firewall service for queries. This will protect you from browsing unprotected in the very unlikely event that should something go wrong with your connection to the CIRA service.